Calendar functionalities
This article contains basics on how to book appointments, block off time and perform all necessary actions to edit any appointment or event that's showing in your calendar
Calendar tab
The calendar tab gives you an overview of your provider calendar. You can toggle between day or week view.
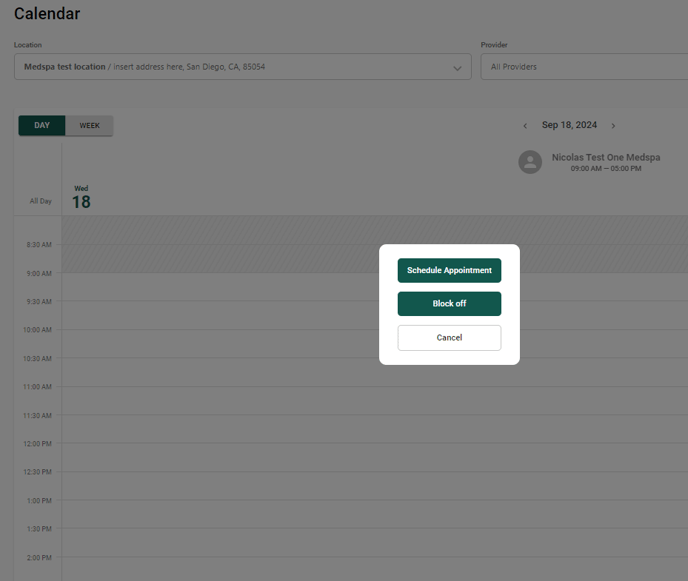
You can also click on any available white slot to either schedule an appointment or block off working hours.

Note for Medspa admin:
If your Medspa has more than one provider, make sure to do this on the corresponding provider's calendar. This is what the calendar view looks like with two active providers.
You will be able to select for which provider you want to make changes with a dropdown menu at the top:

Schedule an appointment
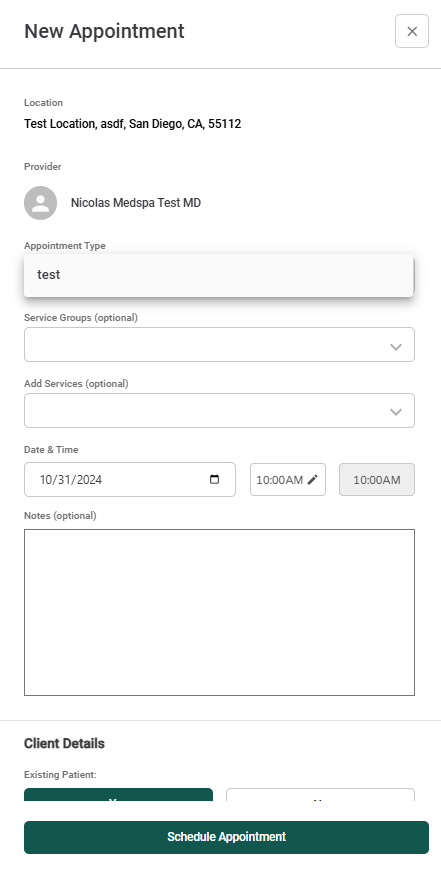
Click on "Schedule an appointment" to create a new appointment.
You will have to go through the following steps:
- Select the location
- Select an appointment type, and Service group (this last step is optional)
For more information on Setting up appointment types go to the Appointment types section here.
- Then you will be able to add another Service to the appointment.
- Select date and time for the appointment
- You will be able to add a note
- Select if it's an existing patient or not.
If it's for an existing patient, then you will be able to look by name or email for the patient and select it.
If it is not an existing patient, you will be able to create a new patient right there.

Block off hours
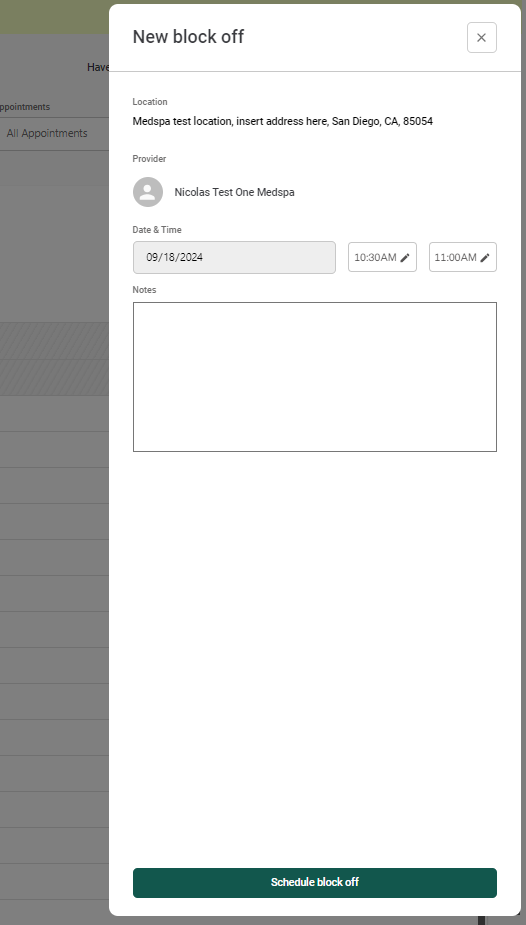
Or you can select "Block off hours" to prevent patients from booking during specific hours of a specific day.
You can select the date and time for the hours you want to block from your calendar, so no patient can schedule in that time frame.

Override working hours
You will be able to override hours to show as available for a specific day, within a day and time that is not part of your schedule of available days & times.
This can be done by clicking on the pencil icon next to the provider's name, on the top right corner:
You will be able to select the time frame that you want to override:
Booking confirmation feature:
If enabled, an SMS will be automatically sent to your patients for appointments booked through the EHR, allowing them to confirm their appointments.
This setting is meant for two things: give you clear visibility of the appointment status within the appointment details, while also helping reduce no-shows.
How to enable to this feature:
You can choose to opt in or out of patient appointment confirmations.
This can be toggled on or off at the moment that a Location is created at the bottom:
Also, it can be revisited if you choose to switch this setting back off or back on by going to Scheduling > Locations > Edit
Once an appointment is scheduled, with this feature on it will trigger an SMS that will be sent to the patient asking for the patient to confirm the appointment within a timeframe.
As a provider or medspa admin, within the calendar you will see that depending on the status of confirmation of each appointment, you will see a different color in the calendar and it will show a status for the appointment, such as:
Pending confirmation, Confirmed or Canceled if it was canceled.
